
So you’ve decided to convert your cargo van to a camper van! Awesome!
In this video, Mike will give you some ideas, tips and tricks on how to insulate your van, and upholster the walls and ceiling of your van to make it look like a professional did it!
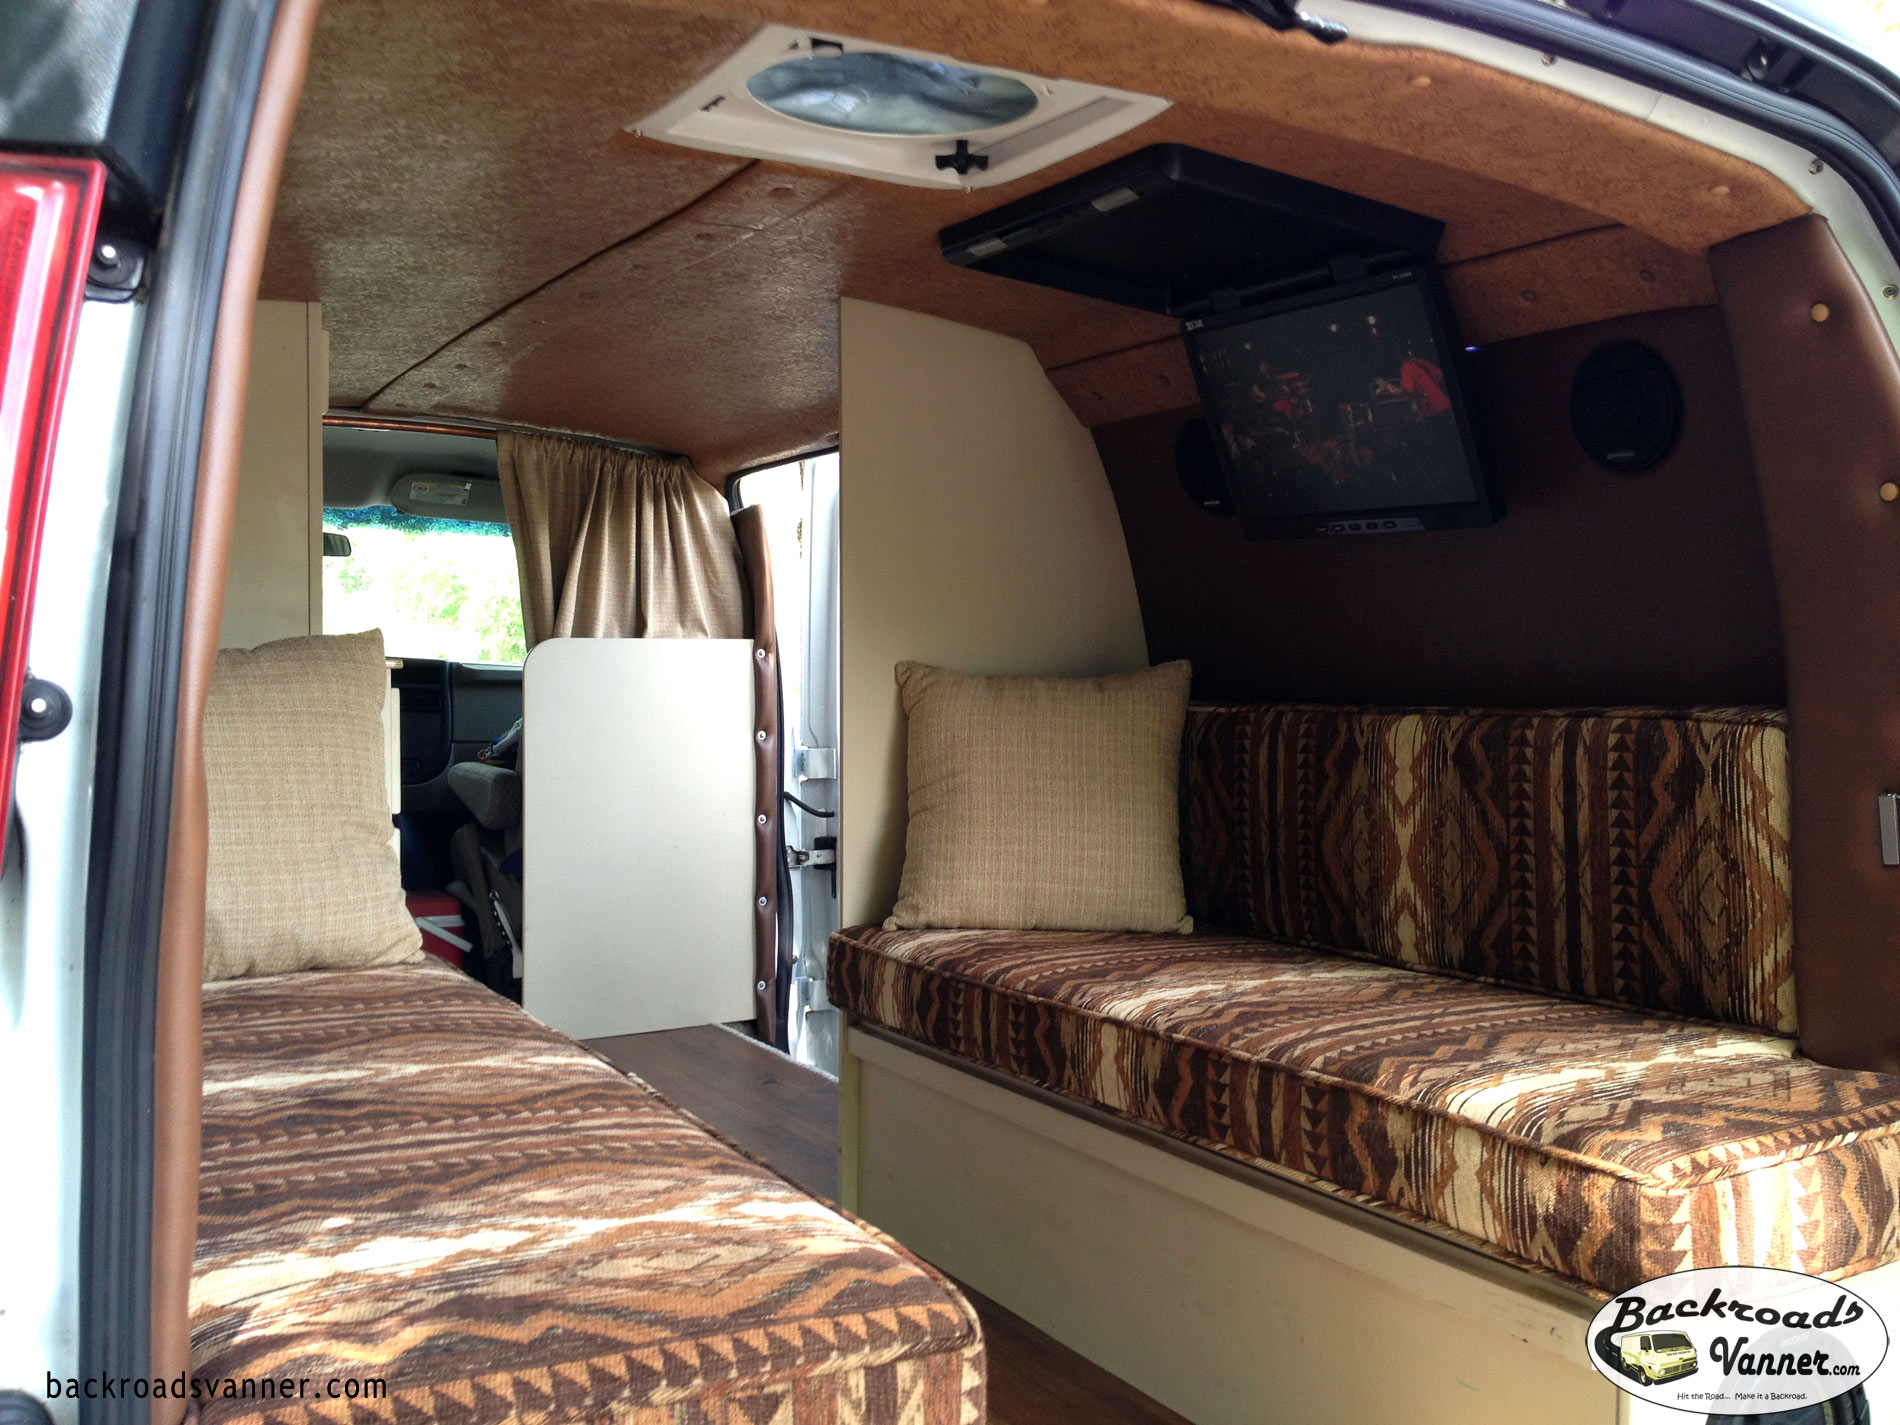
After you’ve insulated your van, then what? Just a couple steps further can take your van from basic to awesome… and show off your personality and creativity in the process! From foam, Reflectix & insulation sheeting to plywood, carpet, luan and upholstery, there are many options and layers that can go into your custom van. We hope this video will inspire you and help you to “do-it-yourself” and create the custom van interior you’ve always wanted!
Below is a list, with links, to most of the materials that Mike mentions in the video (watch the video by hitting the play button above or on YouTube here).
Here’s one way you could insulate your cargo van / camper van:
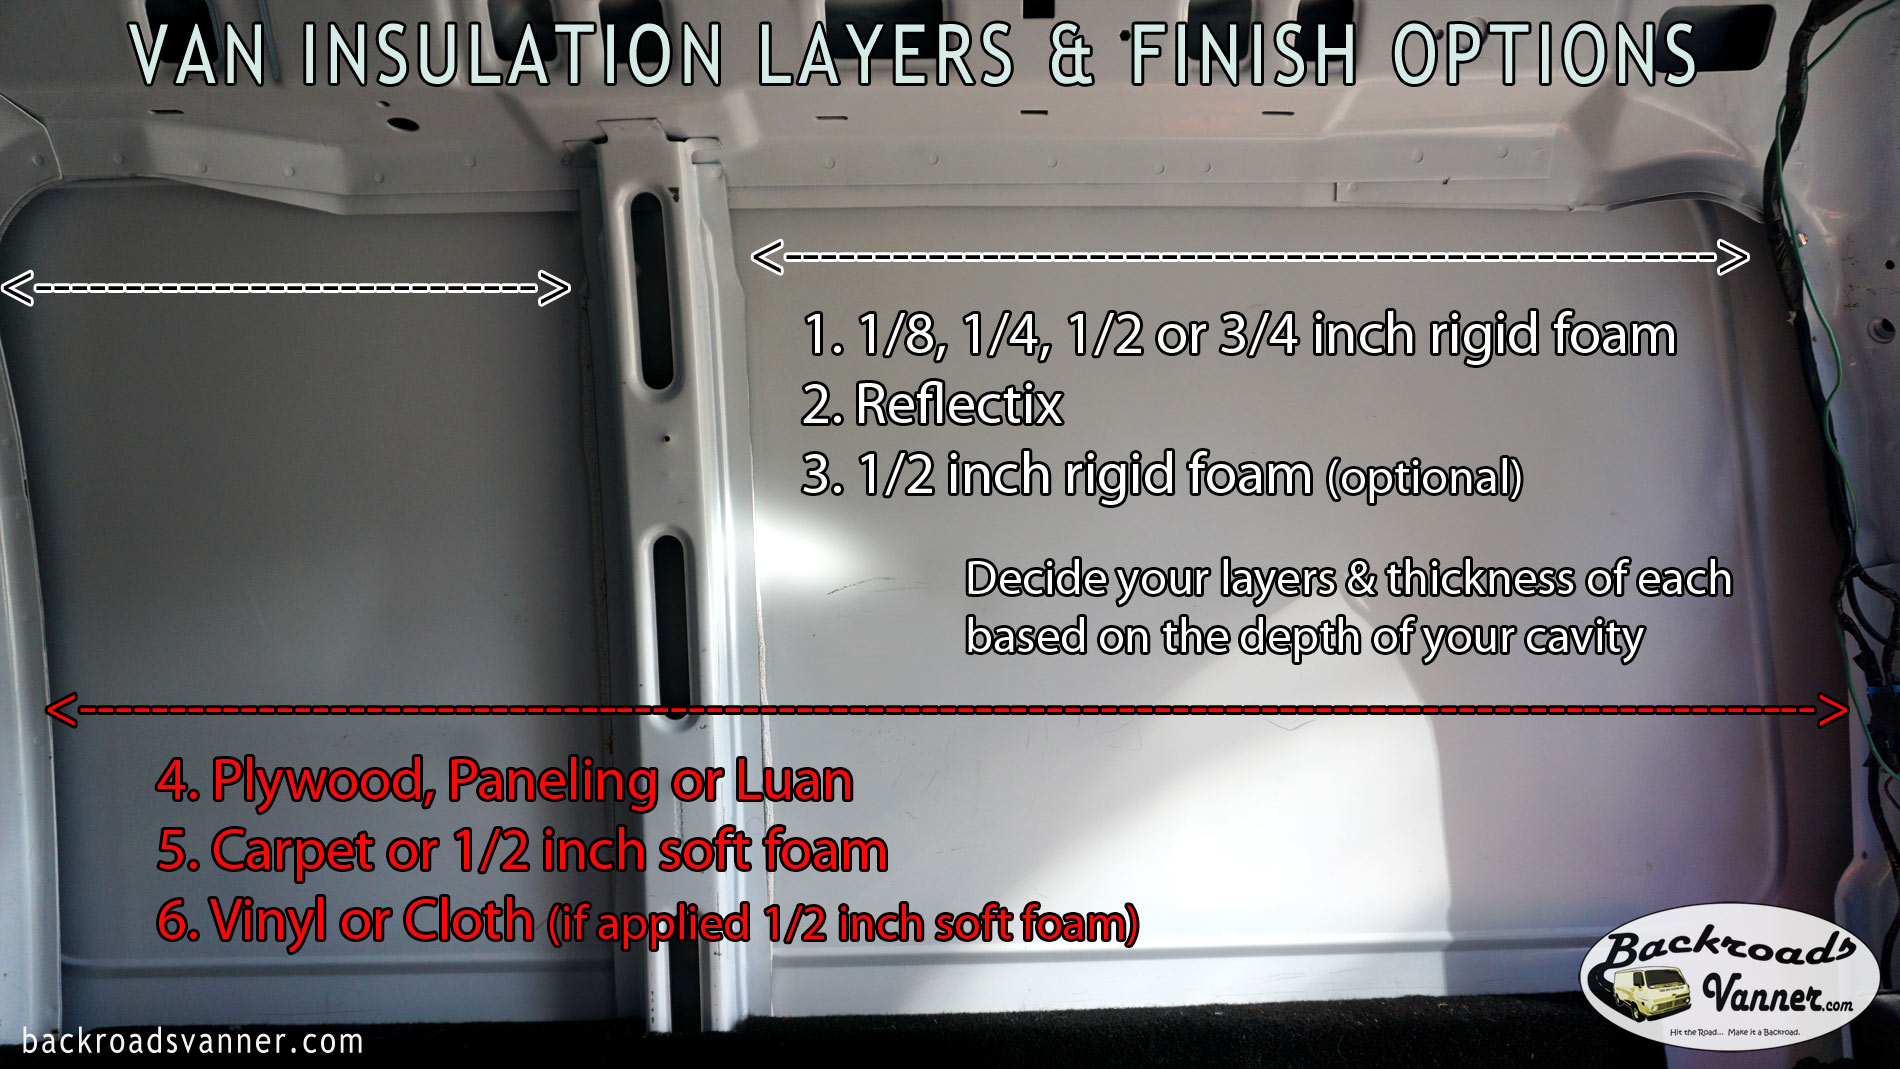
In Between the Metal Braces That Run Along the Sides and Ceiling of Your Van, Layer the Following:
1. 1/8, 1/4, 1/2 or 3/4 inch rigid foam (OR YOU CAN USE THE SAME PRODUCT YOU USE IN STEP #3 OR SIMILAR)
2. Reflectix
3. 1/2 to 3/4-inch rigid foam insulation – such as 1/2 inch Rmax R-Matte Plus-3 Rigid Foam Insulation Board (According to the manufacturer, this product has superior resistance to moisture and vapor & offers superior fire protection properties compared to any other ridgid foam board insulation). (This layer is optional; you may use a thicker insulation in step #1 and thus eliminate this layer).
Decide your layers & thickness of each based on the depth of your cavity.
The above 3 steps comprise the layers of insulation as Mike insulated his van, but you have some flexibility in the number of layers and the products that you decide to use. For example, you might decide to insulate in just 2 layers by making step #1 a thicker insulation layer and then add the Reflectix in step #2 and skip step #3. There is no hard and fast rule on how you should insulate your van – there are many ways to accomplish the same goal. Follow all manufacturers recommendations regarding the products that you choose.
Also, don’t forget to put insulation in the small crevices/cavities throughout your van as shown in the video. And be sure to run your wires (even adding extra) prior to adding the finishes described below.
Here’s the part “after the insulation.” This is the part that determines the “finished look” of your van.
The Following Will Attach to the Braces and Go the Full Expanse:
4. Plywood, Paneling or Luan. In the video, Mike shows Luan 4×8, which he covered in soft foam and then vinyl.
5. Carpet or 1/2-inch soft foam – usually grey and comes in a roll – you can get this at your local upholstery shop. (if you are using Carpet as your finished look, this is the step where you would apply it.. rather than the foam)
6. Cloth or Vinyl (if you applied the 1/2 inch soft foam)
Other Needed Items:
3M #80 Rubber and Vinyl Spray Adhesive*
(* You may need a different spray adhesive – see this link to 3M Spray Adhesive Chart, read all instructions and choose the best spray for your needs)
To Make Bench Seat Cushions and Backs:
Upholstery Foam:
Extra High Density Polyurethane Foam 4″x24″x82″
Upholstery Fabric: